Showing posts with label stencils. Show all posts

April 6, 2012

Stencilled morsbags using the handle in the design - Round two!

Back in 2010, I posted the first set of stencilled morsbags using the handle in the design. I made a few more in the series not long afterwards, once again using freezer paper for the stencils.

Old-school radio cassette player.

Octopus!

Alien spaceship!

The alien spaceship concept started simply enough, with a sketch of a spaceship (a design suggested by a friend of mine).


Then I got all of my screen paints colours out and went to town. I did it in two layers - colours first, then the black layer. Afterwards I added some details by hand.

I love this photo - it shows the cramped quarters I was working from in 2010. I had everything set up on an ironing board between my bed and my wardrobe.
This detail shows that I didn't quite align my layers. Of course, I realised afterwards that I didn't need to leave a gap in the yellow layer - the black would have printed fine straight over it! Luckily, I like the effect it produced given the context.

Got a bit fancy with mixing colours here.


And my favourite detail - the alien in the cockpit.

This bag is living with the friend who suggested the design.

If you want to make your own Morsbags, grab the free pattern from the site and some reclaimed material (these bags were made from old sheets). Careful - it's addictive, whether you screenprint them or not!

September 13, 2010

Intricate stencil work

So... my crafting hiatus didn't last very long. Ahem.

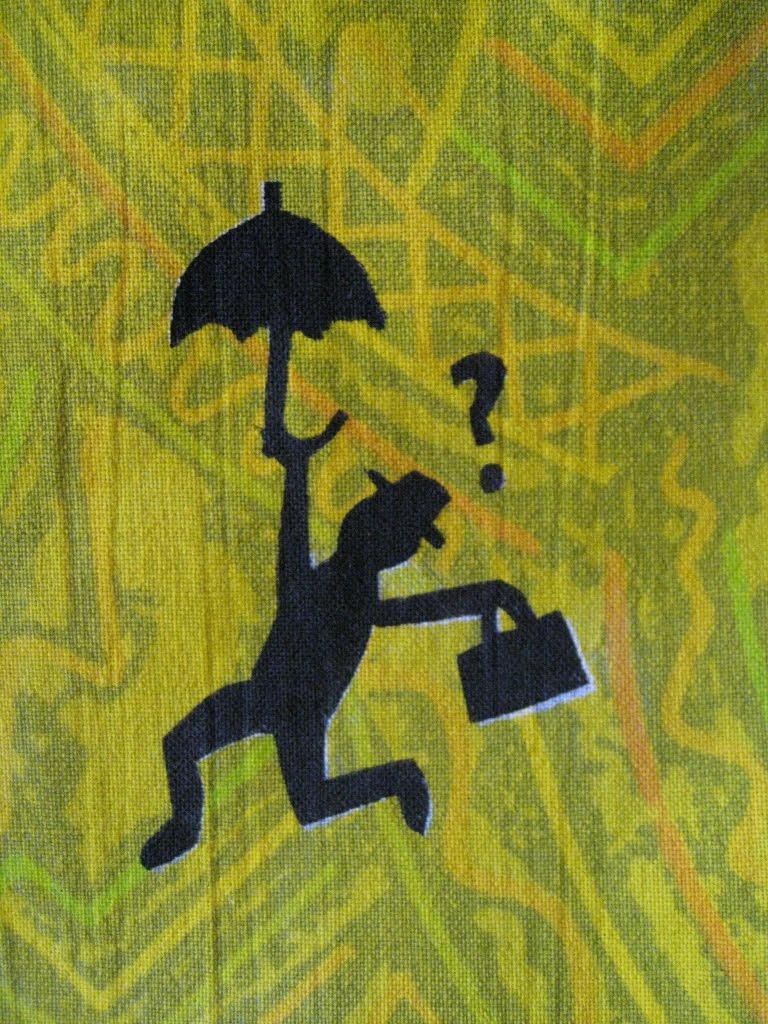
This is not my artwork. A friend of mine gave it to me after I complimented him on it many years ago. Now a special event of his is coming up, and yesterday was the 9th International Morsbagging Sunday, so I decided to print some Morsbags with his design on them.


I painstakingly traced the design onto freezer paper and cut it out (nothing like a looming deadline to make such tasks seem attractive). Doing the leaves and the basket was extremely fiddly.

Seeing the freezer paper ironed on the bag briefly made me consider screenpainting the design in white rather than black!

This was the first print. I made two, because I wanted to make the most out of all that cutting! As you can see, it's the inverse of the original artwork. It was simple because, as you can see from a couple of photos back, it was made from a single cut-out.

Here is the second, more fiddly bag. For this one, I ironed down all the remaining cut-out pieces one by one.

I had originally planned to add some of the finer details (flowers, petals, hair...) with embroidery thread after painting the bags, but I've decided that they look good as they are, and the threads would probably just snag on the inside of the bag anyway.


The labels went on the back, as there was no real place for them on the front.


Here's a little visual reminder of why you need to place some newspaper (or my favourite - cereal boxes) under fabric that you're screen-painting so that the ink doesn't seep through.


For the presentation, I rolled them up and tied them together with a simple tie I made from the same linen I used for the bags.

The linen was picked up for next to nothing at my local op-shop and was so beautifully soft and easy to work with, that I fear I will not want to sew nor print on anything but the best!

Everything has been packed away again, so hopefully I can get some uni work done now. Although when I went to bed last night, my mind was racing with ideas for doll joints and projects using them... uh oh!

June 27, 2010

Birds and bears on bags, oh my!

Spurred on by the 6th International Morsbagging Sunday and a request to donate bags for a "rubbish and bag free" primary school fĂȘte in Melbourne, I whipped up 11 Morsbags last Sunday. Two of these were stencilled...

This bag was decidedly plain and brown, so I decided it needed jazzing up with some birds sitting around on a wire. Which I made into a branch on the spur of the moment by branching one end and making the second one a little curvy.

Of course, once finished, I realised it looked a little silly. Talk about the world's strongest, skinniest branch!

Also, I recommend properly ironing down the freezer paper stencil and always painting away from the edges. Otherwise you end up with blobs like those you can see in the close-up above. But remember... it's a branch! Saved!

Shared under an cc-by-nc license
{source: Dr Case}

The inspiration for this stencil came from the above picture, snapped by Justin Case in Barcelona. I have a lot of my own pictures of street art that I've taken around the world which I also love to draw inspiration from.

The next Morsbag was cute on its own, made from a thrifted cushion cover. The polka-dots reminded me of snow flakes, so I decided a polar bear would be a nice addition.

Even though I've bought coloured screen painting ink, I still end up working predominantly in black and white.

And just to finish up, here's a picture of a stencilled Morsbag I made a little while ago from an old sheet. I have a lot more of this fabric, and I hope each one will each have a stencilled picture to distract people from the pattern!

May 23, 2010

How now, brown... sheet!


I had an old brown sheet to cut up, but was struggling a bit to think of ways to make the bags pretty. It needed a stencilled design on it! Since my last foray into freezer paper stencilling, I have acquired more screen-painting ink colours! I now have black, white, blue, red and yellow.

White seemed perfect... and I was totally lazy and ended up using my laptop's screen as a lightbox, zooming in on the design and placing the freezer paper directly on the screen, tracing over the picture lightly.

Stencil: "Cypress Tree" by Lynell Harlow, available from www.stencilwithstyle.com/lgcatalog2.htm

Sometimes a Morsbag sets itself apart from the rest, and needs to be sent to someone rather than bundled off to the op-shop. This one made its way to Anna Bartlett, a blogfriend who wrote a lovely post about it.

The remaining brown bags had scraps of the blue/brown fabric attached to them.

Unfortunately, due to the length of the scraps & some interesting pinning, the result was less than picture-perfect. Adds to the charm, I'm sure... but next time I may place the stripe off-center, down one side!

August 30, 2009

Freezer paper stencils with Brown Owls


Today I went to my first Brown Owls meeting. The theme was freezer paper stencils, so I prepared a few different stencils and settled on one based on Manu Chao. The actual stencil I used was copied from a picture I took of one on a wall in South America, and it's clearly based on the following photo of him:


It was a fair amount of work cutting out all the details, but it was all worth it when the design was finally trasferred onto the (otherwise unappealing) fabric...

{source: kukita}

There were plenty of great things made that afternoon, including two t-shirts and some fabric destined to make eco-friendly veggie bags:

{source: kukita} {source: kukita} {source: quilting mick}

I'm glad I heard about Brown Owls, and that there's a group in Canberra. I'm looking forward to trying out a bunch of new crafts... in the meantime, I'll get some friends together for some more freezer paper stencilling!

If you want to try this for yourself, check out Neither Hip nor funky's tutorial, Angry Chicken's tutorial or do a quick search on Craftster. Also check out All Buttoned Up's post on using hole punchers.
Related Posts Plugin for WordPress, Blogger...