Showing posts with label books. Show all posts

August 14, 2010

Leather book sleeve

I first saw a pattern for a book sleeve in Zakka Sewing. I'd been waiting for a special occasion to make one, as unfortunately books here come in every size and shape, making such a sleeve unlikely to be reusable for other books.

(Spot the cathy cullis doll in the pic above!)

I was tossing up which fabric to use for it when I remembered that the recipient of this gift had been given some thin leather that had been cut out from the back of the couch of a loved one. It had special meaning for him. Leather is not a material I've worked with before, or plan to work with again.


It didn't need any lining, but I was keen to use this green fabric that I'd saved from the ends of a pillowcase, the rest of which was made into a Morsbag.

Unfortunately I didn't think it through very well and the fabric was threadbare and the leather had a mind of its own. Let's just say that turning it inside out and poking out the corners was a little nerve-wracking.


I used some old packaging to make a little clear pocket on the front.

I also had some beautiful woven ribbon that I'd picked up from my local op-shop which I used to embellish the book and make a bookmark.
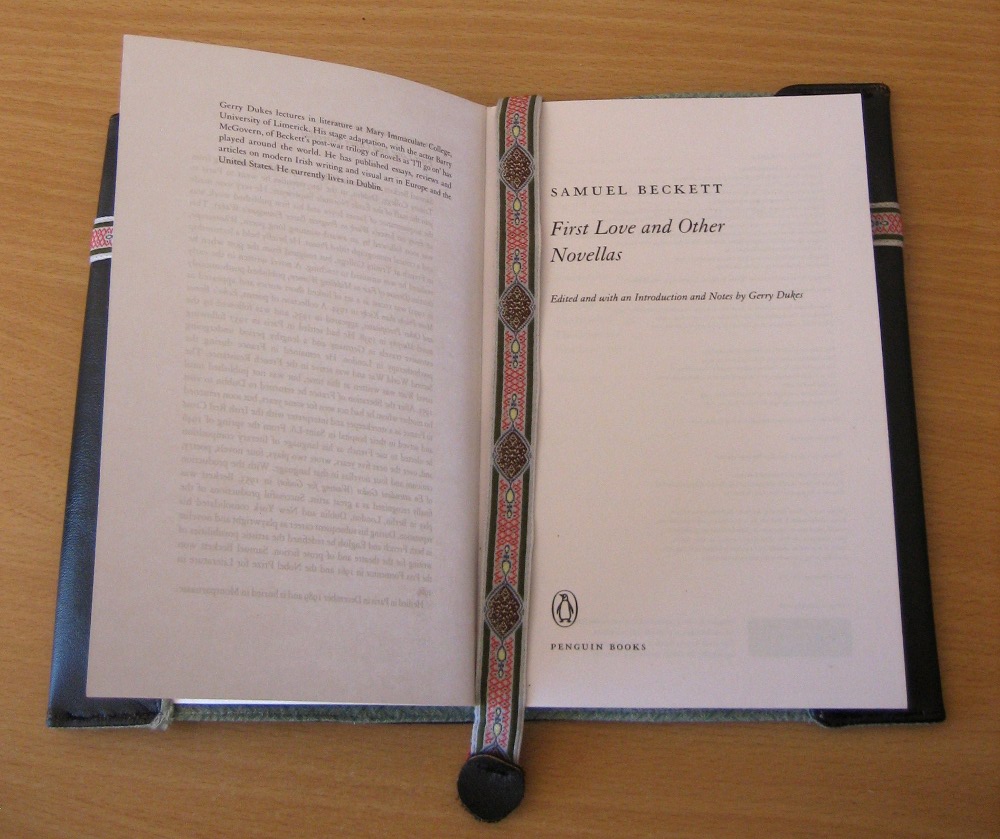
I guess I can always whip up some blank books in that size to fit inside the sleeve for future gifts!

If you'd like to make your own journal cover, there are some great resources here:

July 21, 2009

Shopping bag keep-safe


One of many crafty books I bought recently was Meet me at Mike's by Pip Lincolne who also has her own blog by the same name.

I chose to try the Shopping bag keep-safe project first, as I needed somewhere to keep those pesky plastic bags. It requires "one smallish vintage tablecloth or two vintage tea-towels". I didn't have any such things lying around, but picked up a kitsch tea-towel in pristine condition from the Y's buys op-shop in Kingston for a very reasonable 40c.

As you can see, it is a vibrant yellow tea-towel with a 1979 calendar and lots of flowers and koalas. It measured 74cmx45cm (29"x18"), meaning I was actually able to fit all the pattern pieces on the one towel, although the front is sideways. I actually like it that way, so you can see the date and the two koalas.


I made one small alteration: I added a button to the strap, as I knew I'd be attaching it to railings and handles with no opening to slide it on. It worked out OK...I even worked out how to use the buttonhole and the button foot on my sewing machine!

I also like the fact that the end of the strap says "WTF"... Wednesday Thursday Friday of course ;)

It fits all our rogue plastic bags (we don't have too many, having nice cloth shopping bags) and I used a cheap little fastener because that's all I had on hand. A strip of velcro might have worked better.


All in all, it was a fun project... I especially liked the fact that the book came with full-sized pattern pieces (no wrestling with the photocopying machine) though I managed to lose two of the four pieces in the process :(

June 23, 2009

Wool felt camel from Sew Soft Toys

Meet Miguel. He's made from 100% hand dyed wool felt from Winterwood toys, a company based in Australia. If anyone knows of any other suppliers of wool felt here in Aus, please let me know! Lincraft and Eckersleys here in Canberra only seem to stock acrylic felt. Winterwood toys stock a variety of colours, available individually or in themed lots: "animal colours", "earthy colours", "rainbow", "skin colours" and "spring". They also have commercially dyed felts.

It was the first time I've worked with hand-dyed wool felt (It makes a difference!), and it was beautiful. Thick, soft, dense... I even liked the uneven colouration from the hand-dying process.

I also bought the book "Sew Soft Toys" from the nice folk over at Winterwood toys.

It has some great patterns in it, including the camel. I had to reduce the pattern size to 75% to fit on the 20x22cm felt pieces I ordered (I ordered the "animal colours" set, you can see them in the top photo). I didn't add the seam allowance, opting to use a blanket stitch to sew the pieces together, which worked well. Good for a lazy winter's evening!

January 20, 2009

Flower person ATC


I must admit, I was a little stumped for this ATC. I took it as a challenge to myself - that's what I like about Swap-bot: other people think of the ideas, then you have a deadline to do them by. It's what makes the difference, for me, between thinking "oh, I'd like to do that one day" to "you need to do this now, and make it good because it's going out to somebody!"

Anyway, the swap stipulated the following:
The idea here is to use a flower, be it stamped, prima type, paper etc etc, and put a face in the middle and give it a body and have a beautiful little flower person.
I had some lovely flower stickers I wanted to use, but was a little bit apprehensive about the body.

In the end, I traced a baby picture from a book I picked up at Abbey's bookshop: Anatomy and Drawing, by Victor Perard.

Ideally I'll be drawing my own figures, but I'm not quite ready yet. So I traced the picture in pencil, and then went over it in a felt-tip pen. I wasn't sure how I was going to colour it - it didn't look right in b&w. Then I remembered how at school we'd make old-looking "parchment" by rubbing a wet teabag on paper.

So I wet a teabag in a small amount of hot water, squeezed most of the water out, and dabbed the picture with it. It made the felt ink run a little, which I liked - otherwise I could have done the pen outline afterwards. For good measure, I dipped my finger into the instant coffee jar and dotted them around the wet picture, which left little brown spots. To stop the paper curling, I placed it between 2 sheets of paper and left it to dry under a heavy book.

I recently picked up some blank ATC cards at Eckersley's Art & Craft store, which has made life much easier. For my last ATC, I used some cardstock I had lying around, but my cutting was a little wonky. Anyway, I used some green scrapbooking papers for the background, and... voilà! Not exactly Ann Geddes, but still!

January 12, 2009

AU&NZ Complete Book of Handicrafts


I was down in Tasmania for the Christmas holidays, visiting family in Hobart. While I was there, I dropped into the Salvos on Elizabeth St. (I love love love browsing through charity shops) and picked up the Australia and New Zealand Complete Book of Handicrafts for au$5.

I love the kitsch cover & gaudy burnt orange background. I love the "Quality&Value" sticker on the front, awarded by the book's own publisher. This second Impression is from 1977, and I especially love the very 70s photos, with big hairstyles & crochet bikinis,


and kids wearing full-knit ensembles & adults wearing crochet ones.


But at the end of the day, I bought it because it has large simple drawings explaining the basics of a range of crafts I've been wanting to learn / brush up on:


It goes over all the basics of:
  1. Knitting
  2. Crochet
  3. Sewing
  4. Dyecraft
  5. Batik
  6. Spinning&weaving
  7. Rugmaking
  8. Patchwork
  9. Embroidery
  10. Machine embroidery
  11. Tapestry
  12. Macramé
  13. Leathercraft
  14. Gifts & Bazaar items
  15. Soft furnishings
I'm most interested in the chapters on crochet, embroidery & patchwork, but macramé looks interesting, as do the chapters on making sofa covers & curtains. I love that there are lots of b&w and colour illustrations... I find some of the projects to be positively unappealing, and others to be surprisingly beautiful. Perhaps I'll share some more photos as I work my way through the book.

I'll leave you with the opening line of the Introduction to ponder over...
Every woman has latent creative talent living within her.
:P
Related Posts Plugin for WordPress, Blogger...