Showing posts with label plants. Show all posts

January 2, 2017

Easy felt strawberries


Why not make some simple strawberries for decoration, or for kids to play with?


Step 1: Draw a circle on a red piece of felt (or other fabric), and cut into thirds.


Step 2: Embroider little strawberry seeds


Step 3: Sew up side up strawberries (by hand, or by machine), with right sides facing (inside).


Step 4: Turn the strawberry right-side out. Sew a gathering stitch along the top of the strawberry, and fill with some stuffing.


Step 5: Pull the gathering stitch tight and fasten at the top with a few more stitches. Then cut some leaves from some green felt.


Step 6: Fasten the leaves to the strawberry. Admire!

August 31, 2010

Australian native flower-press

I had some flowers fading fast, so I decided it was time to do some flower-pressing!

I love the design & colours of this flower-press, which is from my childhood. It still has bits of paper & cardboard from back in the day wedged inside it...

After a few weeks, I could wait no longer and prised open the press.


Results as expected! The white flower wasn't very pretty, but the jonquils turned out really well.


Unsure as to what I actually wanted to do with the flowers, I whipped this up. You can spin the wheel for different early-morning remarks!

January 23, 2009

Another tiny dotee


After completing my last itty bitty dotees, I had an itching to do another one. There's something fun about working in miniature! Plus, I had a small piece of linen with a small bullion rose on it from when I was first learning the stitch which I wasn't sure what to do with.

This time I had no pattern, I just winged it. I played around a bit, using fly stitch for the eyes instead of all backstitch, and making a pointed bottom.

I had trouble working out how to differentiate the face from the body, as the colours don't contrast enough (although their textures do). I played around with surrounding it with beads, but they were too bulky for such a small dollface, and took too much attention away from the rose. I settled for some simple pink backstitching, which I could have achieved using blanket stitch, come to think of it :)

This was not for a swap, but was sent out to a swap-bot member who has severe health issues. There is a small heart dangling at the bottom of the dotee, which is a symbol other swap-botters have been using to show their support for her.

(I love the peachy colour of the back!)

January 20, 2009

Flower person ATC


I must admit, I was a little stumped for this ATC. I took it as a challenge to myself - that's what I like about Swap-bot: other people think of the ideas, then you have a deadline to do them by. It's what makes the difference, for me, between thinking "oh, I'd like to do that one day" to "you need to do this now, and make it good because it's going out to somebody!"

Anyway, the swap stipulated the following:
The idea here is to use a flower, be it stamped, prima type, paper etc etc, and put a face in the middle and give it a body and have a beautiful little flower person.
I had some lovely flower stickers I wanted to use, but was a little bit apprehensive about the body.

In the end, I traced a baby picture from a book I picked up at Abbey's bookshop: Anatomy and Drawing, by Victor Perard.

Ideally I'll be drawing my own figures, but I'm not quite ready yet. So I traced the picture in pencil, and then went over it in a felt-tip pen. I wasn't sure how I was going to colour it - it didn't look right in b&w. Then I remembered how at school we'd make old-looking "parchment" by rubbing a wet teabag on paper.

So I wet a teabag in a small amount of hot water, squeezed most of the water out, and dabbed the picture with it. It made the felt ink run a little, which I liked - otherwise I could have done the pen outline afterwards. For good measure, I dipped my finger into the instant coffee jar and dotted them around the wet picture, which left little brown spots. To stop the paper curling, I placed it between 2 sheets of paper and left it to dry under a heavy book.

I recently picked up some blank ATC cards at Eckersley's Art & Craft store, which has made life much easier. For my last ATC, I used some cardstock I had lying around, but my cutting was a little wonky. Anyway, I used some green scrapbooking papers for the background, and... voilĂ ! Not exactly Ann Geddes, but still!

January 18, 2009

Bullion Stitch & Itty bitty dotee

Whilst browsing dotees on flickr, I came across one that had cute little lips. The creator mentioned that she'd simply used french knots. Having never done any (I'd only dabbled in cross stitch before), I was happy to come across a video tutorial on the Needle'nThread website. It was more helpful than some of the diagrams I have seen, like this one in one of my books:


I began looking at more of Mary's video tutorials and stumbled across the bullion knot tutorial.

I immediately went and found some linen remnants I had stashed away from a dress I made, and a big hoop I used for cheap screen printing. The only embroidery thread I had was blue, so I kind of free-styled some different stitched: french knots, bullion stitches, fly stitch and a little satin stitch.


The results weren't exactly stellar, but more importantly it was fun!

Next, I went to Lincraft and bought a whole lot of different coloured DMC embroidery threads & a smaller hoop as it was quite awkward working on the large one. I used another patch of linen (note the different look of the fabric - it's the same linen, just the other side) and stitched a little bullion rose bud. It's not perfect, but it was fun and it rather cute (I used two fly stitches for the stem & leaves).

One of the reasons I'm mentioning these stitches, is that I'm participating in the Itty Bitty Dotee Swap on Swap-Bot and wanted to incorporate a little hand embroidery into it.

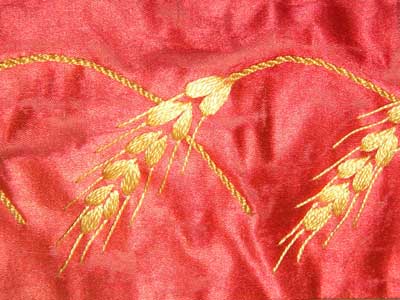
I was inspired by the beautiful insects and plants on Mary's Breath of Spring Embroidery Project. I initially wanted to embroider a butterfly, but I had beautiful shades of yellow thread and decided to start with something a little simpler. I liked the look of the wheat ears featured on an ecclesiastical piece in disrepair, which were done in satin stitch. I found a tutorial on Satin stitch, and jumped right into the project.

I stitched a single ear of wheat (after all the mini dotee is only about 2" tall!!) and was fairly happy with how it turned out. I practiced a little first, and decided to use a single strand of thread. I combined this with a strand of gold metallic thread for the long straight tips & the stem.

After cutting out the little face, I used backstitch to put on the closed eyes, and I tried out the bullion knot lips. While it's cute, I think they may be a little too big for such a small face!

Next, I cut out the shape of the doll so that I could get sew the face on in the right position. This is where I made a big mistake - I hadn't considered the dangers of fraying, which was quite an oversight! I've been doing a fair amount of felt crafting recently, and it didn't even cross my mind. Disaster struck when I began stitching the hair. I used a big needle, because I used several strands of yellow thread and one gold all at once. The fringe went OK, but making the bullion stitch ringlets put a lot of strain on the material, and it frayed awfully. You can see in the photo that there is only one ringlet on the right, and the fraying that has occurred above it.


Not to be disheartened, I packed my little embroidery basket with the correct threads and materials, and on the 3.5 hour bus ride up to Sydney on Friday, I stitched another one.

Overall, I think the ear came out better the second time round. I was more consistent with the "direction" of my stitches (although they are nothing like in the original), and the hairy tips were better spaced apart. Unfortunately my attempt at graciously curving the stalk simply made it look like I couldn't stitch straight!

I still have to finish her off, and I think I'll leave cutting out the fabric to the very end. Also, I'll sew the two pieces of material together using a reinforced stitch on my sewing machine because both pieces are prone to fraying. I'll post a picture when she's done!

I still have a long way to go with Satin stitch, but am glad to have opportunities to practice in small projects like dotees.

January 17, 2009

Recipe swaps: vegan & scavenger

Two recent swaps I sent off were mmmmm Favorite Recipes - Vegan and Recipe scavenger hunt on swap-bot. As a vegan-leaning vegetarian, I was all too happy to share some of my tried & true vegan recipes, and to receive some other people's in return. The scavenger hunt was also fun, and required each participant to choose recipes from ten of the following fifteen categories:
  1. uses leftovers
  2. contains no meat
  3. is for a soup
  4. is for a dessert
  5. contains corn
  6. was found in a magazine
  7. you've never tried
  8. is your favorite recipe
  9. can be made in a crock pot or slow cooker
  10. is for an appetizer
  11. contains cheese
  12. is for bread or muffins
  13. contains fruit
  14. is for a dip
  15. is really bad for you-but tastes soooo good
I sent only veggie recipes (and my swap partner for the scavenger hunt is also kindly sending me only veggie ones), including the following yummy soup from The Canberra Cook, which is great for winter:


Roast Tomato and Red Lentil Soup

Ingredients

  • 1kg tomatoes.
  • 1 litre good vegetable stock
  • 180g red lentils
  • 1 medium onion
  • 1 clove garlic
  • 1 tablespoon olive oil (or just a teaspoon works)
  • 2 tsp oregano
  • salt, pepper
Recipe
  1. Halve the tomatoes, arrange in a single layer on a deep sided baking dish, roast in a moderate (160C) oven for 40 minutes. They should be well done, but not dried.
  2. Gently fry the onion & garlic in the oil until onion is golden. Add the lentils (washed & picked over as needed), stock, tomatoes and oregano. Also add any juices from the bottom of the tomato baking dish. You can slip the skins off the tomatoes at this point if you so desire.
  3. Simmer until lentils are done - these are the type that go to mush, not the whole ones. Run through a blender to get a smoothish texture. Thin down with water or more veggie stock to your desired consistency, and add salt and pepper to taste.

The format was sender's choice, and my partners didn't specify whether they wanted cards or sheets or anything, so I ended up printing on to letter-sized paper (by that I mean I printed on A4 and tried to trim it down to letter dimensions...! See this wiki article for more on North American vs the International standard!)

For one thing, I don't know what a standard recipe card size is, and also my recipes were quite long, and there were many of them. Still, I got out some coloured paper and decorated them best I could. Aside from the tomatoes, I also made some more vegetables.... including eggplant, carrot, lemon, peas and spinach amongst others!


It was fun! So much fun, in fact, that I got carried away and decided to make a tomato magnet too... here it is!


It is slightly raised & filled with pillow material. It was the first time I had used blanket stitch, and it works well to seal the edges of flat felt objects! :) The magnetic strip was adhesive but I found that I also had to stitch it on to really stick (luckily it is thin, and the needle pierces it easily).

In the meantime, I need to improve my photography & digital editing skills somewhat!


Related Posts Plugin for WordPress, Blogger...