Showing posts with label animals. Show all posts

April 8, 2012

Toy Society Drop: Constance Bunny

In 2010, I won a Tollipop giveaway: an original painting of a bunny. At that time, I also sketched a little picture of a toy I wanted to make based on the painting.

In 2011, I cut out the pieces for the toy, hoping to make a softie for the Mirabel foundation. I missed that deadline, but in 2012 I finally got around to sewing the toy in time for an Easter drop for the Toy Society (drop #1817).


Constance was made from a smattering of linen and cotton fabrics I had picked up from freecycle. If (when!) I make another Constance bunny, I will try and make the face rounder (perhaps attach it separately instead of having the head/body as one pattern piece), the dress wider at the bottom, and I will probably not stuff the ears. I still think it ended up being pretty cute, wonky arms and all.


I bundled Constance up in a plastic sleeve to protect her during her overnight jaunt in the park. Luckily I had a stash of labels and info sheets from the last time I did a drop.


I snuck out last night and hung it from some play equipment. I hope someone visited the park and Constance found a good home on Easter Sunday!

April 6, 2012

Stencilled morsbags using the handle in the design - Round two!

Back in 2010, I posted the first set of stencilled morsbags using the handle in the design. I made a few more in the series not long afterwards, once again using freezer paper for the stencils.

Old-school radio cassette player.

Octopus!

Alien spaceship!

The alien spaceship concept started simply enough, with a sketch of a spaceship (a design suggested by a friend of mine).


Then I got all of my screen paints colours out and went to town. I did it in two layers - colours first, then the black layer. Afterwards I added some details by hand.

I love this photo - it shows the cramped quarters I was working from in 2010. I had everything set up on an ironing board between my bed and my wardrobe.

This detail shows that I didn't quite align my layers. Of course, I realised afterwards that I didn't need to leave a gap in the yellow layer - the black would have printed fine straight over it! Luckily, I like the effect it produced given the context.

Got a bit fancy with mixing colours here.


And my favourite detail - the alien in the cockpit.

This bag is living with the friend who suggested the design.

If you want to make your own Morsbags, grab the free pattern from the site and some reclaimed material (these bags were made from old sheets). Careful - it's addictive, whether you screenprint them or not!

March 7, 2012

Softies for Mirabel 2010


I got this this guy to Pip at Meet me at Mike's just in the squeak of time for the 2010 Softies for Mirabel drive.


It was the second time I'd joined in the fun, Eugene (the udderly lovely cow) having taken part in 2009.


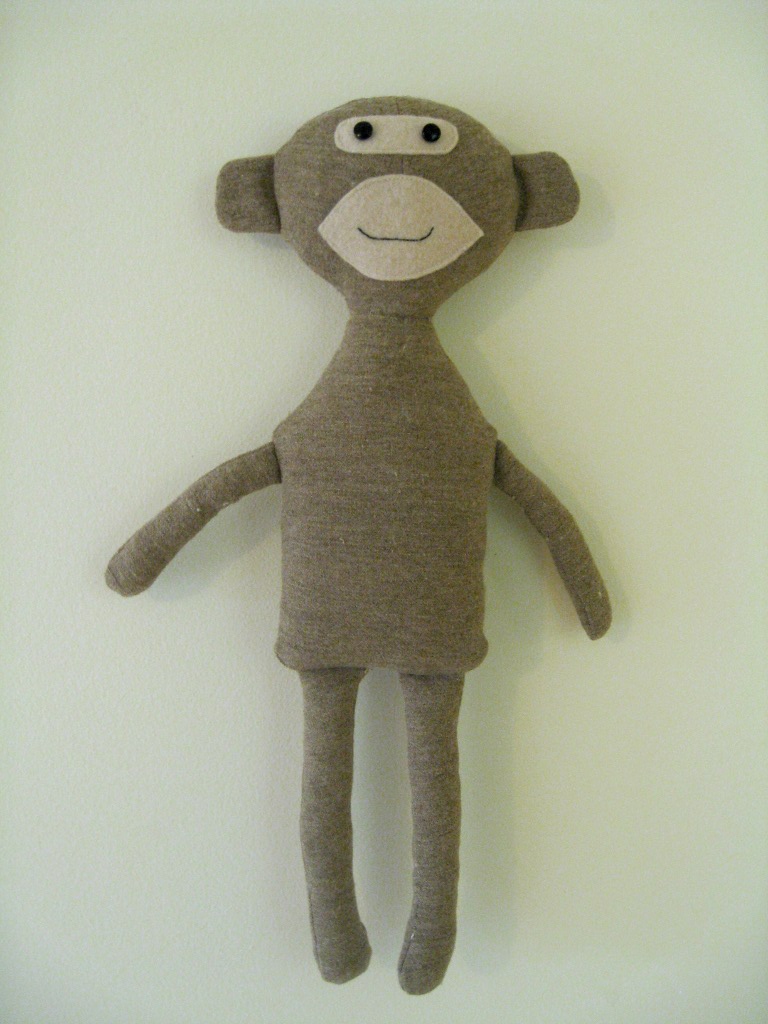
George was made from the albert monkey pattern in the softies book, contributed by Fiona from Hop Skip Jump.

The trousers were very fiddly, but very cute.

It was a great project for using up odds and ends of fabric.

Sadly, I missed the deadline for the 2011 drive. I have the pieces already cut out for the 'Constance bunny' sketch, which might now end up as a Toy Society drop.

August 28, 2010

Stencilled morsbags using the handle in the design

I was prepared for the 8th International Morsbagging Sunday, organised by I bag you, and had 26 kits cut and and ready to be sewn.

Here are the finished bags! The material is from 4 single sheets from my childhood. There wasn't quite enough for them all to have matching handles, so I decided that some of them would get one black handle which would then work into a design. Much like the red lemur bag!

Next came the planning stage. This involved lots of quick sketches to get some inspiration. I ended up with 17 bags to stencil! So far, I've managed...

A snake bag...

A hanging monkey bag (with one skinny ankle)....

A power cord bag (with sparks - first time I've used colour fabric paint)...

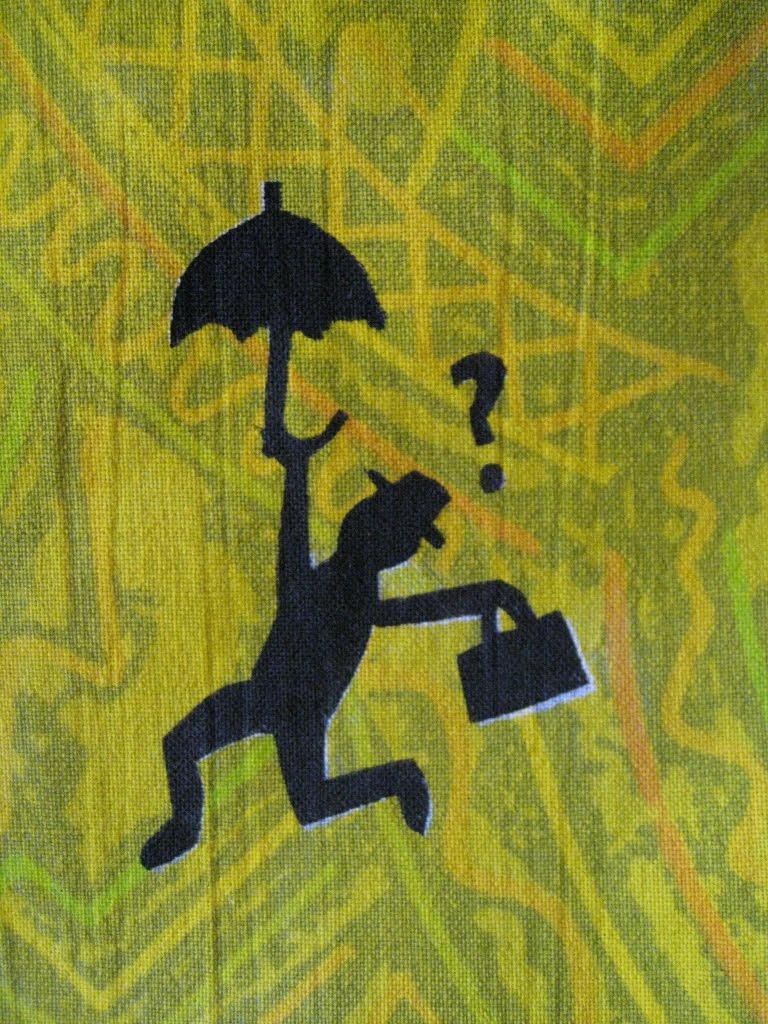
An umbrella bag...

A cat bag (I used a photo to design this one, hence its realism)...


And last but not least, a fatty fatty boombah bag. As you can see, realistic anatomy is not my strong point, unless copied from a photo!

There's a bit of go-go-gadget arm action happening there. And some cankles. And boy is that ape one fatty boombah. No more bananas for you!

Six down, eleven to go... If you have any ideas, please share!

July 25, 2010

Stamp carving with Brown Owls

I hadn't been to a Brown Owls meeting in such a long time, so it was great to be back and crafting with other people again.

This month's activity was stamp carving, and there are some great tutorials listed for it if you're interested. I'd been a little disheartened by my attempt to carve lino, but carving erasers was a much nicer experience!

It's nice to be able to give it a go, ink it, and then make adjustments. For instance, I had to get rid of a bit in the corner of the robo-postbox one. Also, don't forget to reverse things like writing if you are drawing directly on to the stamp... that's how I ended up with an exclamation mark before the envelope!


These are the sketches I worked from... and I'd love to think up some more. These will be great for stamping envelopes with. Check out the meet's stamping round-up for some great inspiration!

February 14, 2010

Happy Valentine's day to 15 strangers

The Morsbags crew coordinated a mass handout for Valentine's day. I decided to participate, seeing it as a good excuse to put a dent into the pile fabric I've been acquiring from the local op-shop. And I work so much better to deadlines!

I churned out a whopping 15 bags, which I posted into random letterboxes around my area late last night with a little note saying "Happy Valentine's day" & explaining what Morsbags are. Admittedly, the plan is flawed... who checks their mail on a Sunday?


Here are the bags, neatly stacked up on my desk... which is looking deceptively clean! Note my new pincushion from Ivory Blush Roses & lovely painting from DeadpanAlley... yay!

I spend a lot of time at this desk, with Uni work spread out everywhere one day, and then my trusty sewing machine out the next. As you can imagine, I spend a lot of time unpacking things and packing them back up. I look forward to the day when I might have a dedicated sliver of space for arty crafty activities!


So does my housemate, I'm sure, as from time to time our living room becomes an extension of my workshop. (Note the lovely retro red pincushion I bought from Ginpins...)

Most of the bags I made were from old pillow cases, but I made a few more from tea-towels.


I ended up making another bag from a horse tea towel, extending it with the same fabric I used for Eugene's body! The handles were sourced from a pillowcase.


The other tea-towel bag features Australian wattle and is "extended" at the top rather than the bottom. This one will actually be sent to someone overseas (via sendsomething) rather than put into a local letterbox.

I wish you all a lovely Sunday, whatever you have planned!


Related posts: Morsbags, Recycling old pillowcases into Morsbags, Morsbags from tea towels, Pin cushion from Ivory Blush Roses, Eugene wants a hug

February 3, 2010

Red lemur bag!


This bag was dreamt up as an entry for the Morsbag forum's Animal morsbag competition. Life got in the way, and I hadn't even started it when the competition finished. It didn't stop me making it anyway... after all, I'd already sketched it out and chosen the fabrics!


And here's the sketch. After cutting out the red fluffy bits for the sides of the face, I realised how unevenly sized they were... just like in the sketch! Something to remember if you just plan on enlarging & cutting out a hand-sketched pattern without thinking about it too much. Make sure it's right first!

Why a Lemur? I wanted to do something red and fluffy, as I have a stash of bright red fake fur. I was originally going to make an orang-outang bag, but after looking at many cute photos, I settled on a red lemur instead.

Shared under a cc-by license
{source: photojenni}

Something about those eyes!

I started by making the face out of felt. I then cut out each layer of the body and blanket stitched everything together (with a trip of orange felt between the edges of body pieces to make them stand out a little more).

This furry felty lemur was quite heavy, and I was worried that the bag would hang to one side and sag at the front. Especially since the spotty fabric was old thin stuff I'd picked up at the local op-shop! This was exacerbated by the fact that the design had it sitting to one side of the bag (so that the tail could be the handle! Yay!). I ended modifying the original Morsbag pattern by adding a layer of bamboo batting & lining it with more spotty fabric inside. It doesn't hang lopsidedly at all.

I think the end result is part cute, part craftastrophe... Suffice to say, it doesn't see the outside of the house much! We hang it off a doorknob to keep all our other cloth shopping bags in and to startle unsuspecting guests!


Related posts: Morsbags

January 21, 2010

Toy Society Drop: Zing the polite cat


Meet Zing, the polite cat. He comes from One Red Robin's pattern of the same name in the book Meet me at Mike's.

He is made from recycled materials including an old pair of purple jeans and a remnant of fabric my sister brought back from Nepal. I made him half-size, and the pattern was easy to follow.

I made him especially for a Toy Society drop (#945) - check out the site for more plushies!

I bundled him up and left him with a letter in an envelope explaining what the Toy Society is about, and a tag that said "Take me home - I'm yours".


I left him near a foot bridge in Telopea Park (Canberra, Australia) a few days ago (20 January 2010).

Somebody picked him up that same afternoon and sent a lovely email to the Toy Society straight away. It really made my day to see that email, and the accompanying photo.

I'm so glad I managed to get another toy out there, as I've been so distracted by Morsbags recently!


Related post: Toy Society Drop: Greggles

November 7, 2009

Eugene wants a hug!

I finished Eugene last night, so he'll be off to join the everyone else's toys for the Softies for Mirabel drive soon :)

He turned out pretty well, though I had trouble with a few things. I struggled with the face stitching and ended up using small black felt circles for the eyes. I was incapable of sewing the horns on straight, and it took me ages to do the last step where you tuck in the bottom and sew on the legs... but it was worth it!


Related post: Udderly lovely cow for Mirabel

November 5, 2009

Udderly lovely cow for Mirabel

I'm sure many of you have heard of Pip's annual Softies for Mirabel drive. If you haven't, head over and read about it. It's a worthwhile cause and a good excuse to make a softie!

I completed my fourth-last piece of assessment for the semester today (optimistically worded!), a study of the morals and ethics in a short story by Isabel Allende. Since the essay's in Spanish, I read over it again and again, knowing that no matter how hard I try, there are always mistakes... very frustrating! At least when you're sewing, you can see the mistakes and unpick them... anyway, to cheer myself up I chose a softie to make, settling on Fliss Dodd's pattern: The Udderly lovely cow from Pip's Meet me at Mike's book.


It's been high on my "to do" list for some time, but I could never decide which fabric to use.

I took the plunge and chose soome fabric and cut out all the pattern pieces. The floral patterned fabric is from my parents' old sheets and the red clay-coloured fabric is from an op-shop. The horns are made out of gorgeous hand-dyed wool felt from winterwood toys, whereas the face & heart are straight acrylic felt.


Stay tuned for the finished product!

If you're thinking of sending in a toy, try and have it in by the 1st of December. They'll be on display for 10 days before being divvied up amongst the kids. Happy crafting!


Related post: Eugene wants a hug!

July 27, 2009

Felt monkey phone case

I bought a new phone recently - not because my trusty old brick of a Nokia finally died (that thing was indestructible), but because I had carelessly misplaced it. After three weeks of searching, I briefly toyed with the idea of forgoing a mobile phone altogether, before caving in and getting a new-fangled one. I also shelled out for a protective plastic case... which I promptly broke.

Hence the birth of Grégoire, my grumpy phone cover, inspired by Rosa Pomar's soft toy from the book Plush-O-Rama.


He's made of felt, with bamboo wadding to offer a little protection.... the phone slides neatly in and out of the mouth, much to the bemusement of those around me at the time!

June 23, 2009

Wool felt camel from Sew Soft Toys

Meet Miguel. He's made from 100% hand dyed wool felt from Winterwood toys, a company based in Australia. If anyone knows of any other suppliers of wool felt here in Aus, please let me know! Lincraft and Eckersleys here in Canberra only seem to stock acrylic felt. Winterwood toys stock a variety of colours, available individually or in themed lots: "animal colours", "earthy colours", "rainbow", "skin colours" and "spring". They also have commercially dyed felts.

It was the first time I've worked with hand-dyed wool felt (It makes a difference!), and it was beautiful. Thick, soft, dense... I even liked the uneven colouration from the hand-dying process.

I also bought the book "Sew Soft Toys" from the nice folk over at Winterwood toys.

It has some great patterns in it, including the camel. I had to reduce the pattern size to 75% to fit on the 20x22cm felt pieces I ordered (I ordered the "animal colours" set, you can see them in the top photo). I didn't add the seam allowance, opting to use a blanket stitch to sew the pieces together, which worked well. Good for a lazy winter's evening!

March 23, 2009

Giving old drawer bottoms new life with potato stamps


I was despairing at the sorry state of the my desk drawers (read: procrastinating from work) this afternoon. I got the desk from an ex-housemate and the bottom panel had torn paper coating and was pretty filthy. The front panel (with the handle) also has a bad habit of half coming off whenever you open the drawer. So I took it off completely and set out to find some pretty paper to line it.

I didn't have any suitable paper in my stash, but I did find some plain brown paper. Thinking back to primary school days, I grabbed a potato, cut it in half and drew a pig on it. I then crudely cut the edges off from around it.

I taped the paper to the panel, grabbed some paint and stamped to my heart's content.


I had a little trouble sliding the bottom panel back in, as the paper made it a little bigger. But I eventually got it in, the bonus being that the tighter fit means the front bit no longer falls off!

I recommend you grab yourself a potato and give something new life... hopefully you have better drawing, cutting and stamping skills than me :D

February 28, 2009

Sheep dotee


I made this for the Dotee Tag thread on the swap-bot forums.

The face is a simple embroidered felt cut-out.

After cutting out the two body pieces from white felt, I proceeded to sew a WHOLE lot of small white pom-poms to one of the pieces. It took longer than I originally thought, because I also had to sew them to each other so that they'd stay tightly packed.

On the plus side, I didn't need to put much stuffing in it

January 3, 2009

Glucksschwein swap


I made this pig for the Glucksschwein swap at swap-bot.

I made it from Runo's pattern, making it half-size. The colouring is inspired from a black and white potbellied pig.


I saw that my swap partner also likes Dotees. Having only just discovered them myself, and after looking through many galleries of them on Flickr, I decided to make my first one.

My housemate liked the pig toy I made, although it became known as the "cow-pig". I sketched a "cow-pig" dotee design and am happy with how it turned out!


Related Posts Plugin for WordPress, Blogger...